Ace of Coders — My Winning Strategy

Last month CodeCombat began their latest tournament, Ace of Coders. As a veteran (and winner) of two of their previous three competitions, I naturally had to try my hand at their latest work.
The tournament ran from Wednesday 16 September to Wednesday 14 October. This time around I (Wizard Dude) came in first place with a total of 1532 victories and a mere 3 losses. My nemesis from Zero Sum, NoJuice4u, finished in second, trailing me with 1527 wins and 6 losses. Check out the CodeCombat blog post for the official breakdown.
In this post I’ll explain my strategy and how I developed my solution. You can also find the full source code on Github if you want to dig into the gritty details.
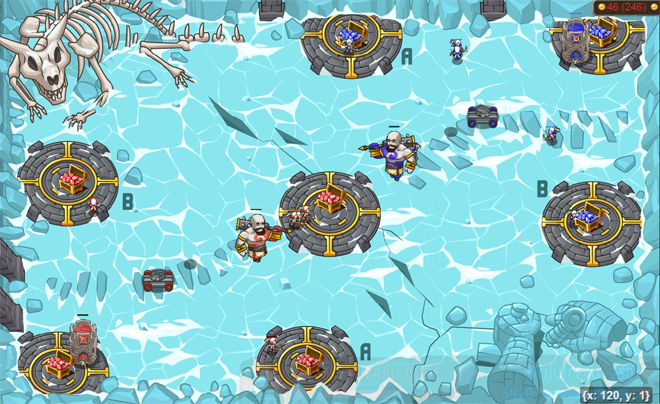
About Ace of Coders
In Ace of Coders, two players each control a hero competing for control of seven strategic points. The ultimate goal is to destroy the enemy hero without being destroyed yourself.
The points are labelled
nearCorner, nearA, nearB, center, farA, farB and farCorner.
These labels change depending on which side you start on,
so players can play both sides without changing their code.
A player controls a point by having the closest unit to it
within a small radius.
Controlling a point provides a small constant gold income.
The heroes can pay gold to summon military units which appear by their side. The units can be individually commanded, allowing for detailed micro-management. The heroes themselves also have abilities that they can use to influence the battle.
Units

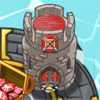
- Goliath
- Your hero. Loads of HP and damage, and packed with abilities, but low mobility and range.
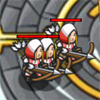
- Soldiers
- Durable, short-ranged melee fighters. They are the cheapest unit to build.
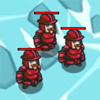
- Archers
- The fastest unit on the field. They out-range soldiers, but have low health and cost a little bit more.
- Towers
- The only building. The most expensive of all the units, but has lots of health and its arrows out-range archers.

- Artillery
- Slow and expensive, but packs an extremely long range shell with massive splash damage. Can injure your own troops, though.
Abilities
- Hurl
- Hurl a unit behind your head, or in any direction you please!
- Throw
- Throw a flaming boulder at a target, or at the ground.
- Stomp
- Create a powerful shockwave around you that damages units and sends them flying.
My Strategy
The game is largely about gaining control of the centre point and trying to outplay the opponent’s army to gain a unit advantage. My army strategy focuses mainly on archers, using kiting tactics to keep them alive for as long as possible while dealing damage to priority targets.
To gain control of the centre, I simply move my goliath directly to the point and stand on top of it. Of course, the enemy goliath will usually try to do the same thing, which results in a wrestling match between the two goliaths. I use my goliath’s abilities to try and keep them away while I accumulate a gold advantage.
The farA and farB points are usually only defended by one unit
and it can be difficult for an opponent to recapture them
once the battle for centre has started.
I build an artillery at the start of the game and,
if it survives the initial conflict,
I use it to pressure these points.
Once the battle for centre has been decided, I clean up the remaining units on the map, then send units to attack the enemy goliath until he goes down.
The Opening
At the start of the game,
I try to get units out to each objective as quickly as possible.
I have Nick to thank for teaching me a thing or two here.
Did you know that you can use hurl on yourself?
I immediately build three archers
and send them towards centre to secure it as quickly as possible.
I use buildXY to summon them in front of me
to save a bit more walking distance.
I then summon two more archers,
one for each of the nearA and nearB points.
Again, I use buildXY to summon them closer
to their respective points.
Finally, I summon an artillery.
The opening artillery is quite important.
If one player has an artillery,
they can safely siege the opponent’s units from afar,
and those units have to either move to dodge the shell or be destroyed.
If they choose to move, they have to stop attacking,
giving your own army precious time to score some free damage.
You can also use the artillery to siege the farA and farB points,
which are typically only defended by a single unit.
Wiping out this unit causes the point to turn neutral,
which means that the opponent must divert a unit from the centre
to recapture it, or face defeat.
In practice, what typically happens is that both players open with an artillery, immediately fire at the opposing player, and, as artillery is slow and is locked in position after firing, both artillery pieces are destroyed in an even trade. Some players even wait to see if you build an artillery, and only build one themselves to cancel yours out.
In my opening, I use buildXY to build the artillery
behind and a bit off to the side of my goliath.
I found that, from this unexpected position,
it is sometimes possible to survive the first shot from an enemy artillery
while also taking theirs out.
With the opening orders completed, my code moves into its main loop and stays there for the rest of the game.
Building Units
As far as army composition goes, I only build archers. There are a few special cases where I build an artillery to counter particularly artillery or tower heavy opponents, but usually the goliath is too far forward to safely build one. I never really considered soldiers, as I viewed their low speed and range as something easily kited by archers, despite their high health.
I will also sometimes build towers to cover strategic points, but only if there isn’t already an allied tower in range and if the enemy has more than two archers nearby. Towers are effective at picking off archers due to their high range, but suffer against soldiers, artillery and the goliath due to their lack of mobility.
I always use buildXY when building units or towers.
I try to position towers behind me,
so the enemy goliath has to come through me to get to them.
I also build my archers behind me,
to give them the best possible chance of making it away to safety,
as the enemy goliath is usually right in front.
Another important topic is when to build units. The goliath is usually right next to enemy forces, which is not where you want archers to be, so summoning at the wrong time can lead to their immediate death. To cope with this, my strategy prevents spawning units if any of the following conditions are met:
- We are on the opponent’s side of the map and the enemy goliath is behind us.
- We are in splash range of an incoming artillery shell or boulder.
Enemy archers are also problematic. If enough archers are in range, they can usually focus down new friendly archers before they are able to get away. To counter this, when enemy archers are in range I wait until I have thrown a boulder at them, then spawn units while the boulder is in flight. The enemy archers must either run, avoiding the boulder and allowing my units to escape, or continue attacking, allowing themselves to be destroyed.
Unit Control
Before commanding each individual unit, there is a global function that decides which point they are responsible for defending. The goliath can also be told this, but some of his code assumes that he is defending the centre.
Assigning archers to points is reasonably simple.
For nearA and nearB, I assign the closest archer.
I assign all other archers to the centre.
Once the centre is captured,
I allow these archers to roam freely and attack as they please.
Typically, I always assign the goliath to the centre.
I will, however, reassign him to either nearA or nearB
if the enemy goliath moves close to those points.
Each unit has its own individual logic that depends on what kind of unit it is. I’ll describe each of these in detail.
Towers
Towers can’t move, so controlling them is simply a matter of selecting the optimal target to shoot at. I simply select the lowest health target within range.
Artillery
Artillery has the longest range in the game, so as long as you stay far back, the only real threat is another artillery piece. My logic goes like this, in priority order:
- If an enemy artillery is in range, fire at it.
- If the artillery isn’t in range, but is within
range + 10, fire at max range in their direction to try and hit them with splash damage. - If we are less than 4 seconds in and the enemy doesn’t have enough gold to buy an artillery, attack the ground in front of their goliath.
- If an enemy tower is in range, attack it.
- If an enemy unit comes too close, move away from them.
- If we are near where an enemy shell will land, move away from that location.
- If there’s an enemy artillery on the field, but it’s not in range, use a forces algorithm to steer towards it while trying to avoid any other enemy units on the field.
- If
farAorfarBbelong to the enemy team, attack their position, choosing whichever one is nearest if they have both been captured. - Attack the nearest enemy tower.
- Attack the enemy goliath.
Artillery splash damage affects friendly units, so I try to avoid shooting at infantry and only go for slow or immobile targets that my units should already be far away from.
Most of the time, my initial artillery gets destroyed
and most of this logic never gets to run.
However, if my artillery does survive,
the pressure it puts on farA and farB is quite effective.
The early game (before 4 seconds) logic is there to try and deal with players who opt not to build an artillery as one of their initial units. By not building an artillery they can build up to 3 more archers, so I try and hit them as they advance in order to reduce their advantage when the fight starts.
Archers
Archers are the primary unit in my army. They have high mobility and range, but they are fragile, so it’s important to kite effectively with them to get maximum value. My logic goes like this, in priority order:
- Identify all the threats on the map. This includes:
- Nearby enemy shell landing points
- Nearby enemy boulder landing points
- Nearby enemy soldiers
- The enemy goliath, if he is nearby
- If there is at least one threat, do some vector maths and move in the average direction away from them.
- If there are units in range,
attack the unit with the lowest health.
- The enemy goliath is excluded from this until 15 seconds have passed.
- If we have been assigned a point to defend, the point doesn’t belong to us and we’re outside of the capture range, move towards it.
- Attack the nearest enemy unit that isn’t a goliath or a tower.
- Attack the nearest enemy unit.
The threat logic helps the archers to kite more effectively, since it helps prevent them from running into danger in order to escape something else.
I prevent archers from targeting the goliath during the first 15 seconds because his health is so high that damage on him doesn’t really matter. Small advantages matter in the initial engagement, so it’s better to find something else to shoot at.
Soldiers
I don’t build soldiers at all, so I have no logic to control them.
Hero Control
I take advantage of my goliath’s high health to control objectives by sitting on them. It’s also important to make the most out of his high damage attack and his several abilities. My logic goes like this, in priority order:
- If there are enemy towers close to
nearAornearB, walk over there and bash them down. - If stomp is up and there are more than 3 units within stomp range, stomp the ground.
- If my throw is up and there’s an artillery, tower or archer within throwing distance, throw a boulder at them.
- If hurl is up and we’re in grabbing distance of the enemy goliath
and we’re closer to
farCornerthan they are, hurl them over our head. - If stomp is up and the enemy goliath is close by, stomp the ground.
- If there are any enemy towers nearby, attack them.
- If there are any enemy soldiers or artillery nearby, attack them.
- If the centre point doesn’t belong to us and we’re not standing next to the assigned point, walk closer to it.
- If the enemy goliath is close to the assigned point,
attack them.
- Sometimes it happens that there is a friendly tower directly between us and the enemy goliath. There is some extra logic here to detect this and try to steer around the tower, instead of trying to walk through it.
- Walk to the assigned point.
Stomping the enemy goliath applies a small amount of knockback and seems to disrupt them, preventing him from issuing troop orders and using abilities for a brief time. This is useful for pushing them away from centre in order to swing the point to your team.
Hurl is also useful for moving the enemy goliath away from the point. Hurling them behind you covers the most distance, but this can often be disastrous since this is usually where your archers are, and all it takes is a stomp from the enemy goliath to wipe them out. In my code I only hurl the goliath when they are already behind me, which, in practice, means that I will only hurl them in response to them hurling me.
Observations
Early in the competition I encountered problems with the transpiler crashing on my code (issue #3049). Luckily, since I still use sweet.js macros (as in the last tournament) I was able to work around this simply by disabling the “readable names” feature in sweet.js, making every variable in my code have a unique name.
I found that my unit building logic faltered against one player’s particularly siege heavy strategy. They would repeatedly shell centre point with multiple artillery units, which kept my suppression logic permanently on, so I would not build any units. I had to add some special case logic to override this and spawn an “emergency” artillery to take them out.
A few players employ a “tower creep” strategy where they simply walk to each point and build a tower on it. Since my strategy was focused on centre, for a while I couldn’t cope with any pressure on the other points. I worked around this with some special case logic in my hero code to hunt down towers.
If you submit code that contains a bug that crashes your code, an angry ice yak will spawn and charge at your hero, killing them quickly. This means that, normally, submitting code that doesn’t work earns you a loss in short order. However, I found one player who was able to use this to achieve victory against me. Their strategy was simply to rush over to my hero and crash their code, spawning an ice yak to come and get them. My code considered the ice yak as another enemy and would attack it when it came near, drawing its focus and leading to death for my hero instead of theirs. I solved this problem by filtering ice yaks from the list of enemies, leaving them to attack their intended target.
One player was able to defeat me by exploiting a strange property of arrow towers. For some of the competition it was possible to make arrow towers shoot far beyond their range by commanding them to attack friendly units. The arrows would go through the friendly unit and fly off into the distance, often into one of my archers. I was able to turn this around by exploiting this behaviour myself, but fortunately the exploit was patched before final rankings took place.
Like in the last tournament, there were still a couple of broken players who wound up with Tharin, the Knight as their hero. Apparently these were filtered from the final rankings, but I still patched my code to cope with them.
Development Process
My setup for this competition was similar to the last one, with a few tweaks. I wrote all my code in Vim, split over a few files, and had a gulp task run after every save to concatenate all the files and run sweet.js. I kept my output file open in a read-only Notepad++ window floating over the CodeCombat tab and would copy and paste from this window to test any new changes. I tracked all my changes in a local Git repository.
This time I also used eslint via Syntastic in Vim to catch easy mistakes in my code such as undefined variables. This was invaluable as my code got longer, as by the end the CodeCombat transpiler took a number of seconds to process my code. Having a tighter feedback loop for trivial errors was very handy. It did take me some effort to set this up though, as I had to tweak my sweet.js macros to look like ES6-style constructs so that eslint could parse it. I think this may have broken some of the hygiene features of sweet.js along the way, but I never found the time to get to the bottom of it.
Closing Remarks
Ace of Coders is yet another solid multiplayer level, and an interesting change of pace from Greed and Zero Sum. The focus on fixed strategic points makes fights feel more controlled and allows artillery to be useful, in contrast to Zero Sum’s chaotic, highly mobile gameplay.
Winning was pretty tough, and I should credit NoJuice4u for playing the game of ping-pong with me as we both repeatedly adjusted our strategies to one-up each other in fights. Nick Winter was also a fierce competitor, though I’m sure that at least some of his advantage was due to having built a large portion of the game. :)
CodeCombat’s beginner campaign has a lot of levels now, so be sure to check them out if you know anyone looking for a gentle introduction to programming. Or, if you’re looking for a challenge, keep an eye out for their next competition!